Using your own account
PLEASE NOTE THAT THESE INSTRUCTIONS ARE INCOMPLETE AS OF MAY 14, 2020. PLEASE DO NOT PERFORM THESE WORKSHOPS UNLESS AT AN AWS HOSTED EVENT UNTIL THIS WARNING IS REMOVED.
Only complete this section if you are running the workshop on your own. If you are at an AWS hosted event (such as re:Invent, Kubecon, Immersion Day, etc), goto Start the workshop at an AWS event.
Create an AWS account
You are responsible for the cost of the AWS services used while running this workshop in your AWS account.
Your account must have the ability to create new IAM roles and scope other IAM permissions.
If you don’t already have an AWS account with Administrator access: create one now by clicking here
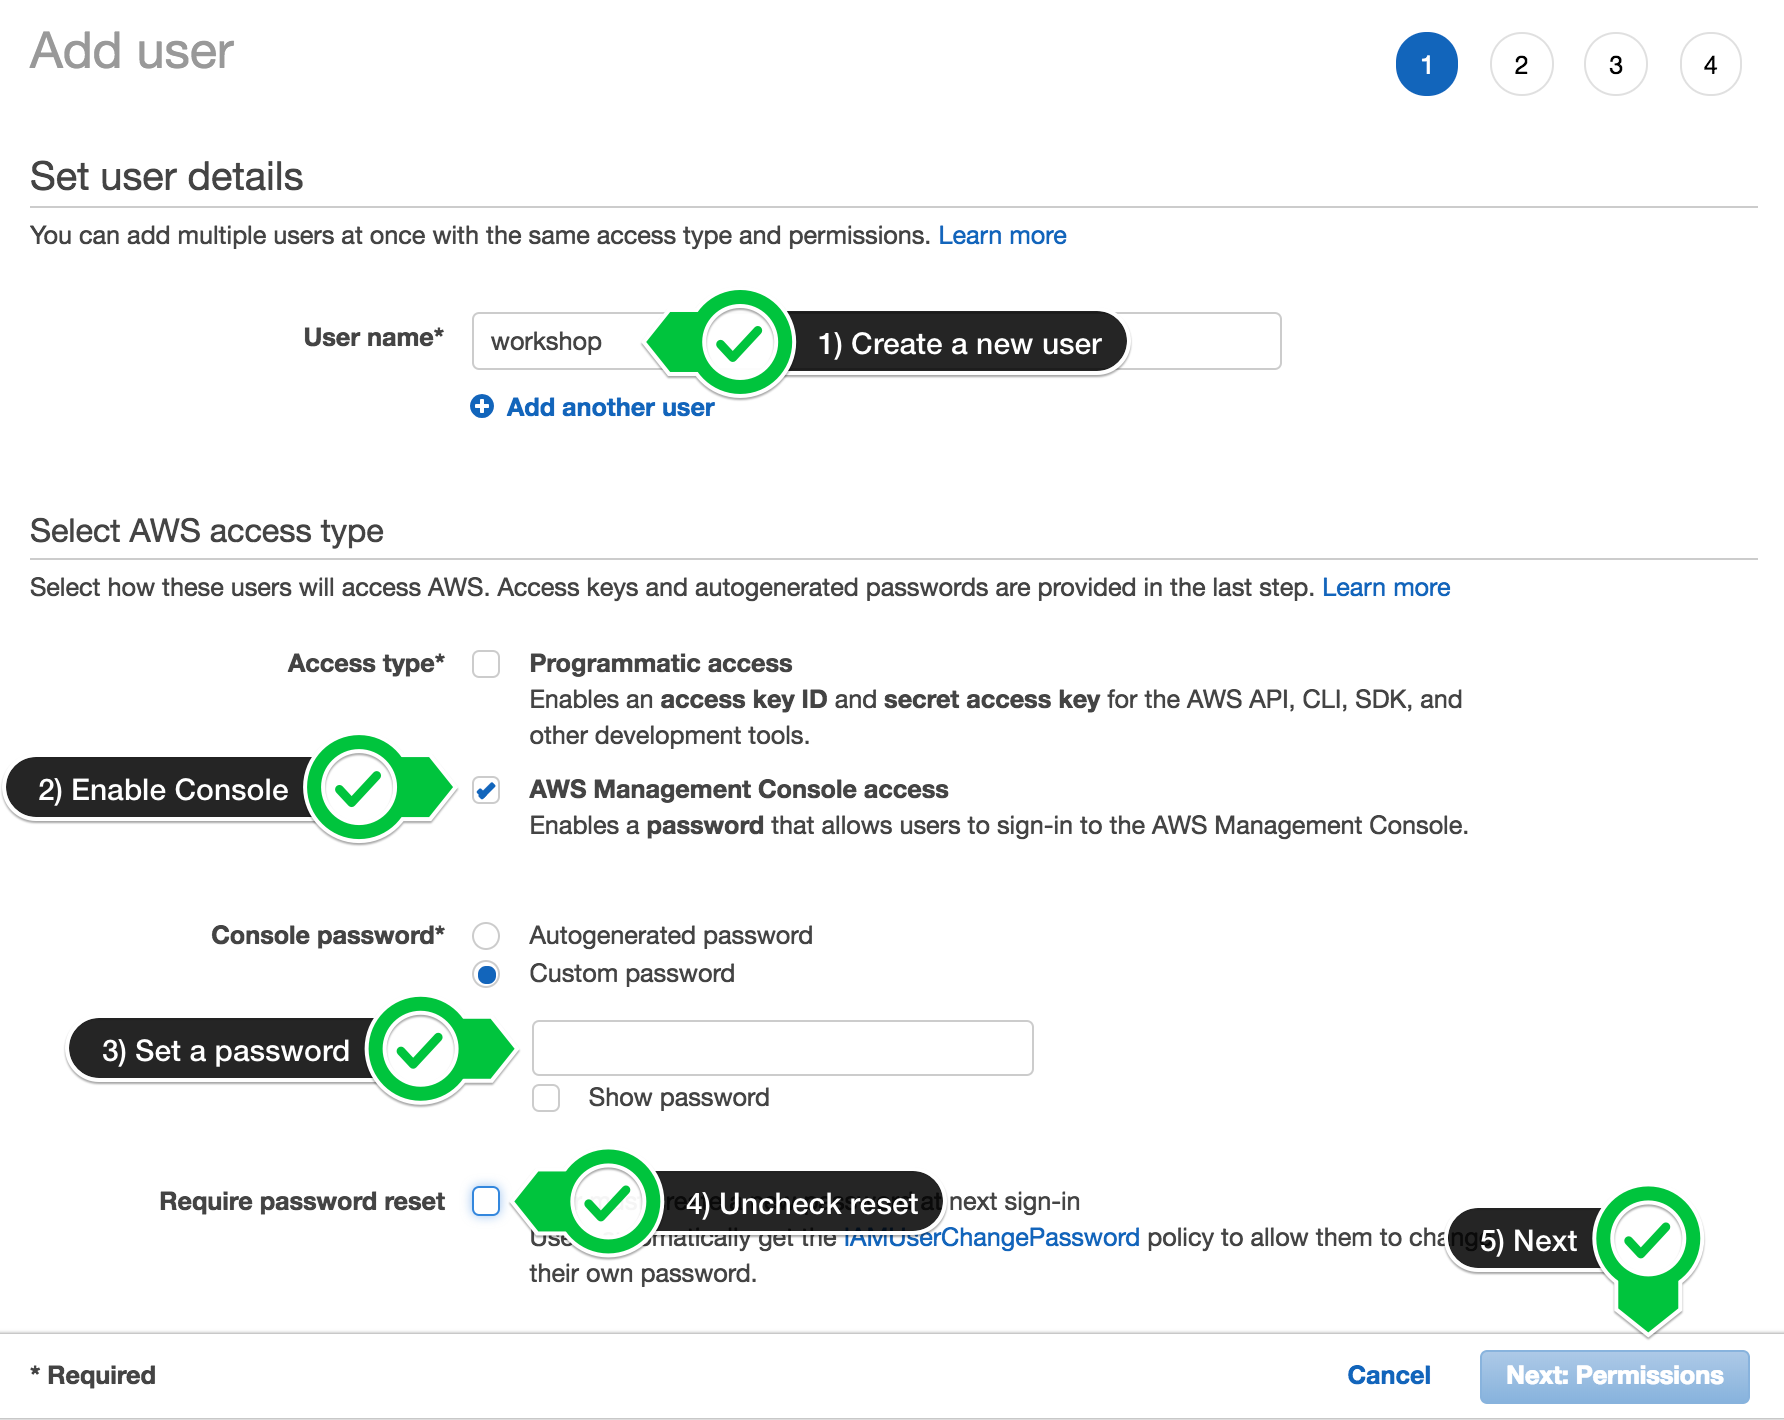
Once you have an AWS account, ensure you are following the remaining workshop steps as an IAM user with administrator access to the AWS account: Create a new IAM user to use for the workshop
Enter the user details:
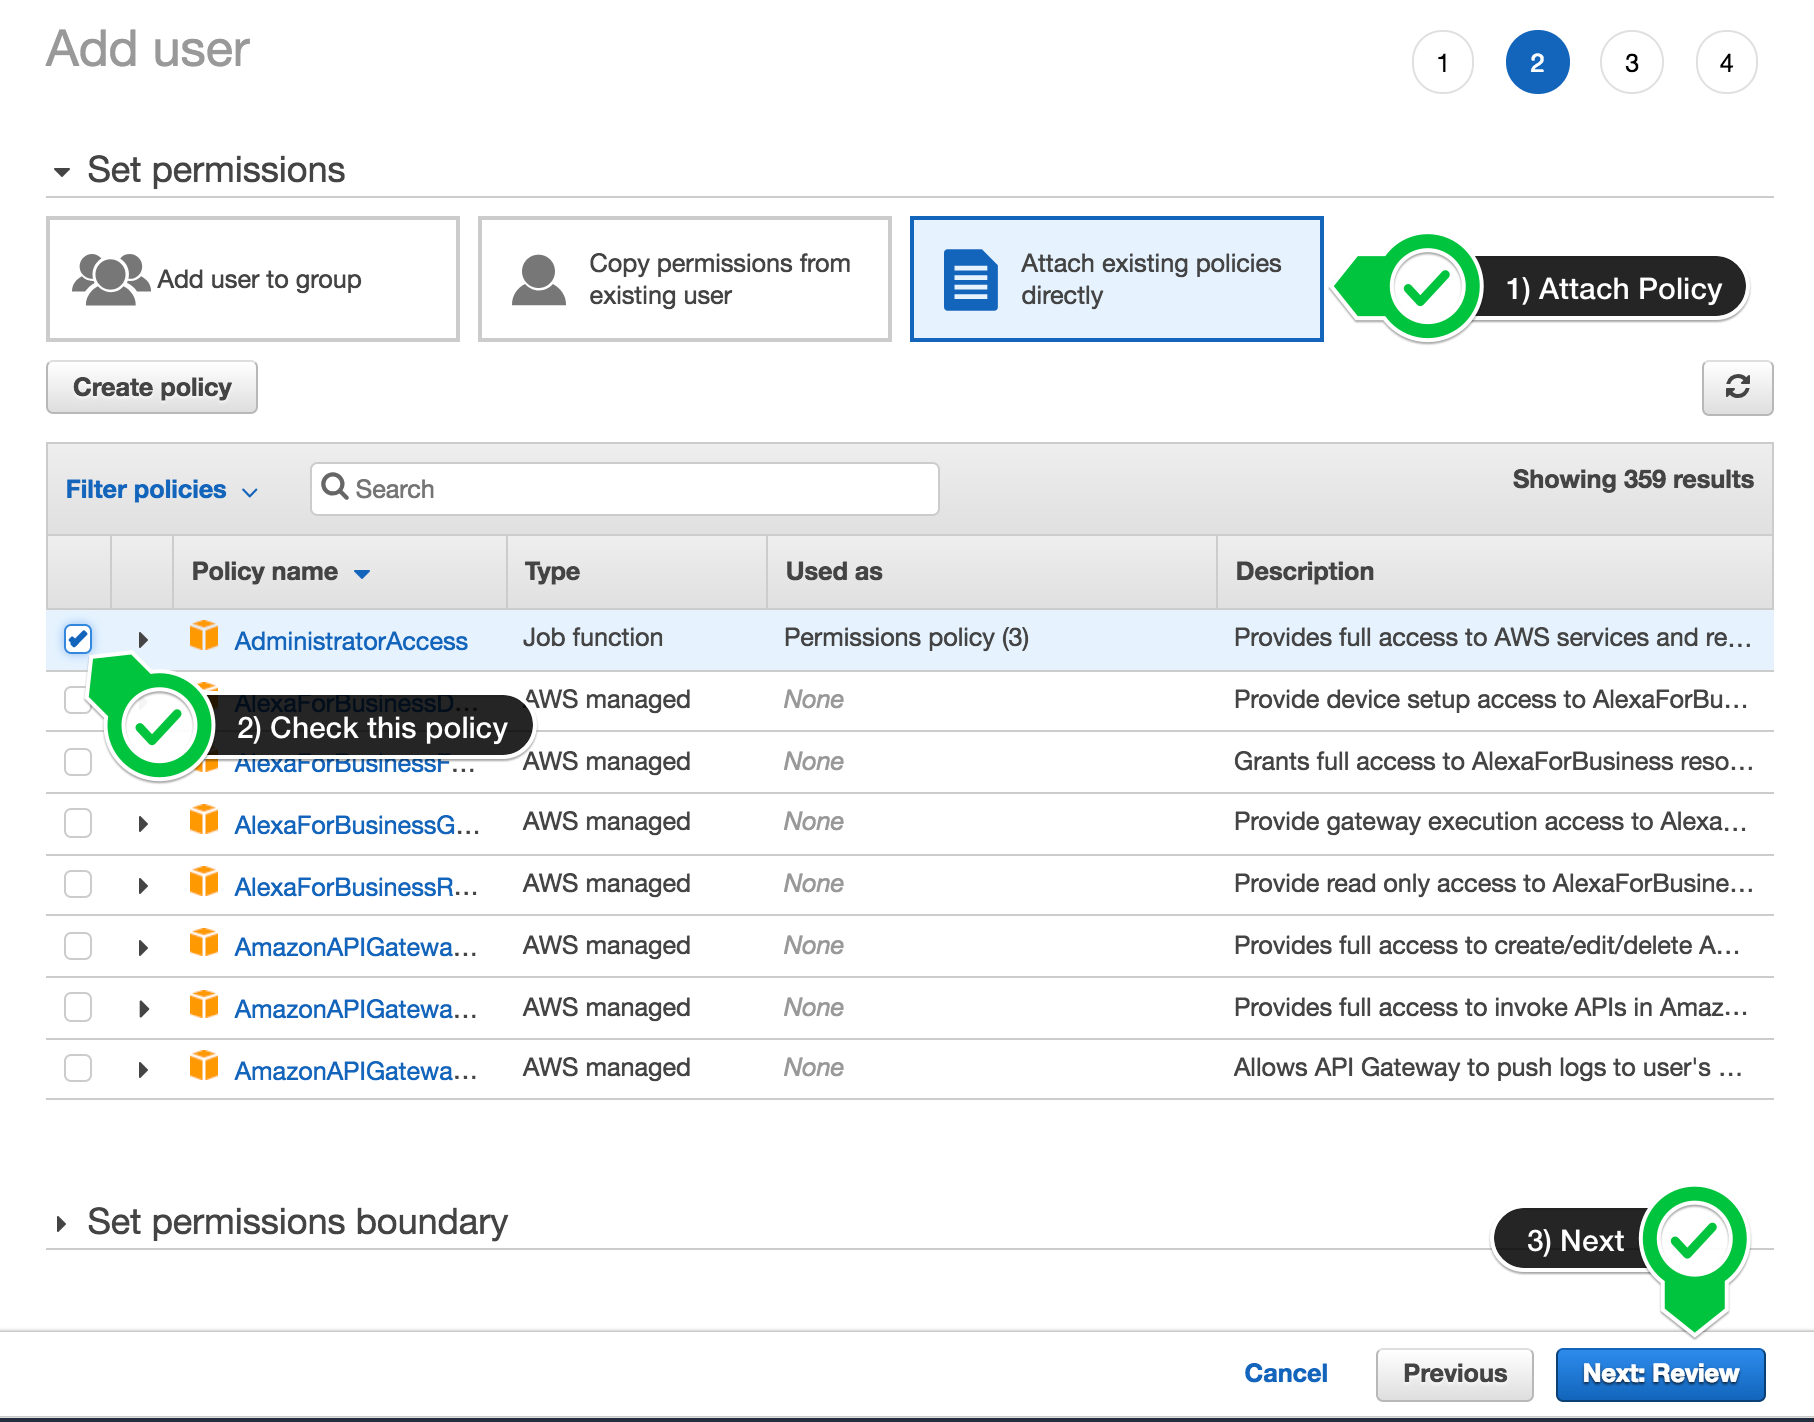
Attach the AdministratorAccess IAM Policy:
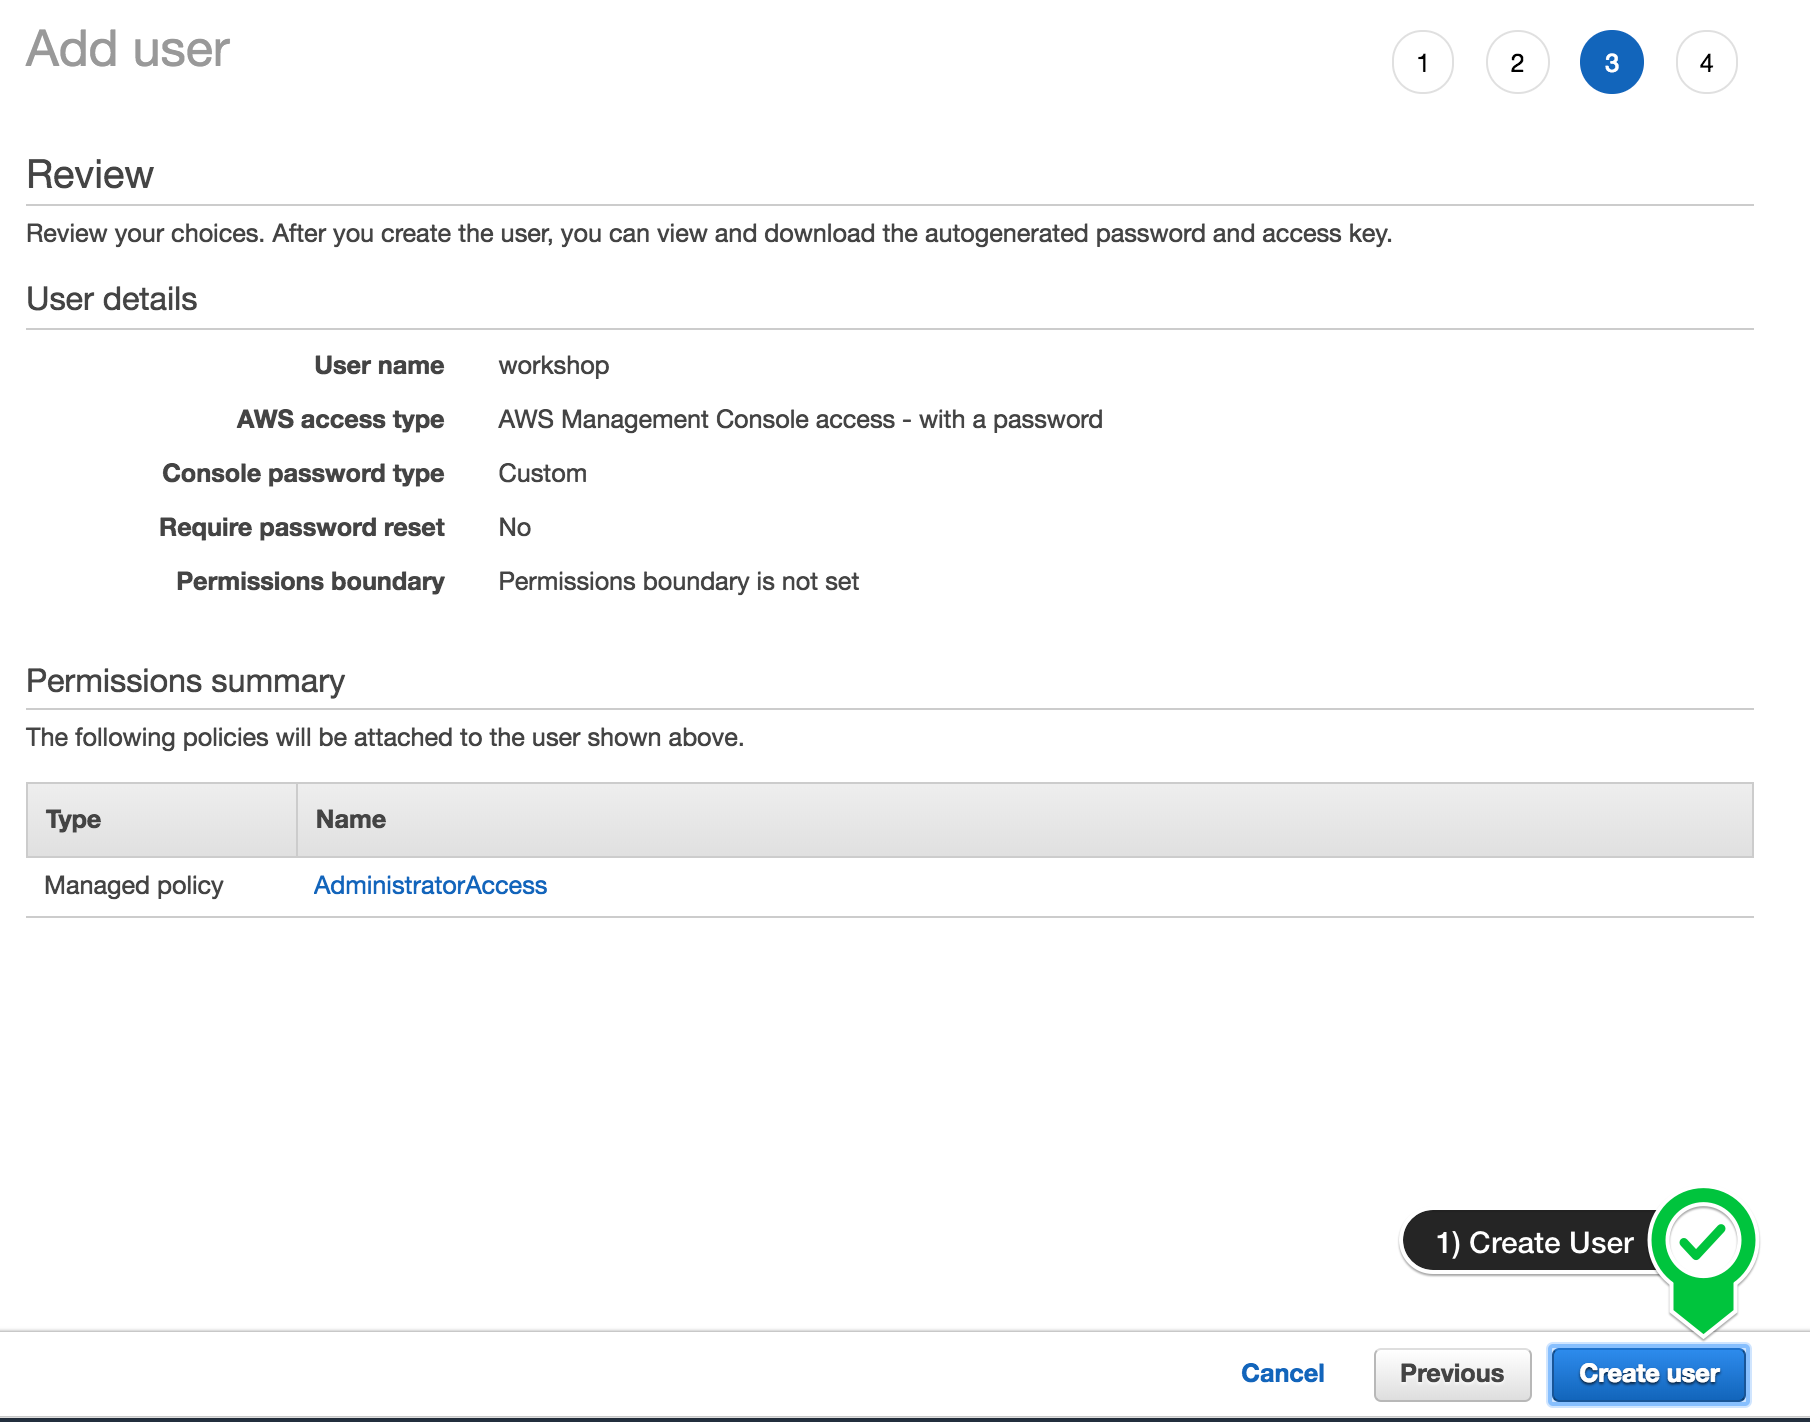
Click to create the new user:
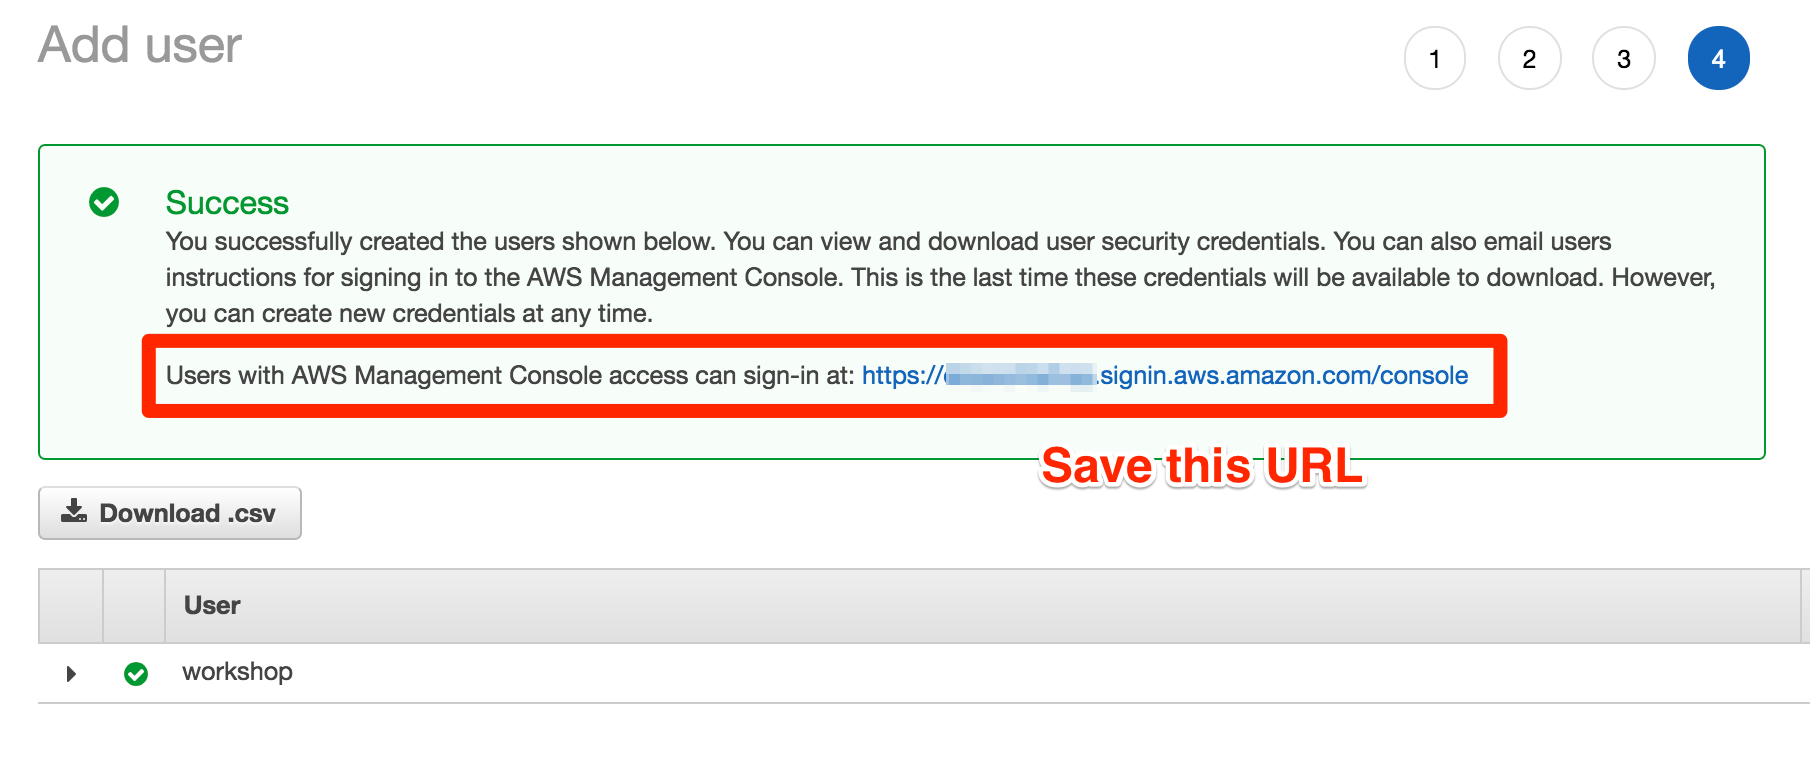
Take note of the login URL and save:
Login
Now logout and login as as the new workshop user.
Create keypair
This workshop will provision several EC2 VMs, so we will need to make a key pair that the CloudFormation script expects.
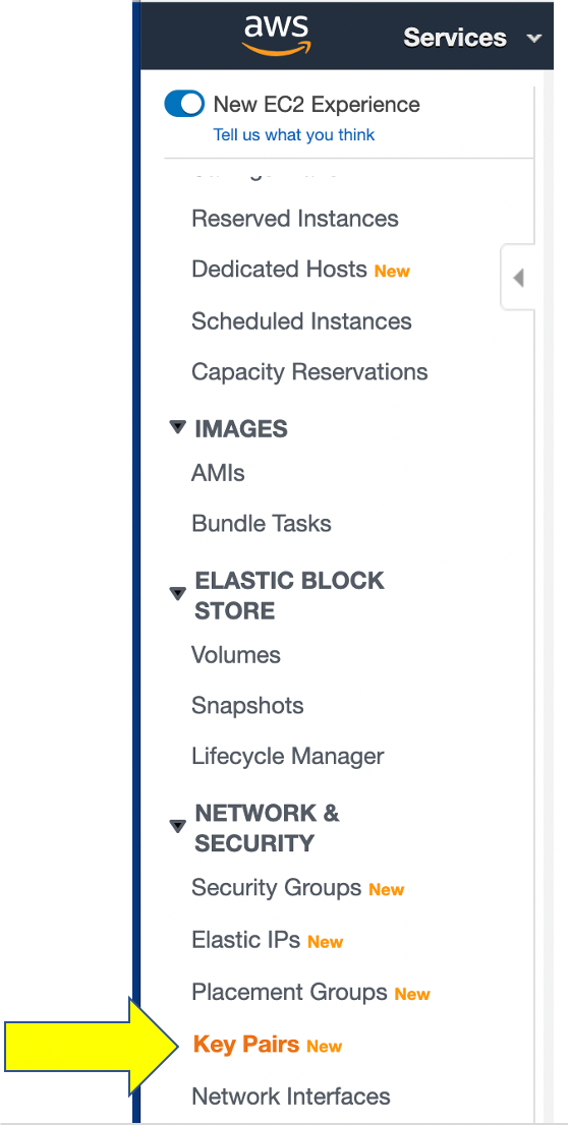
Within the AWS web console, navigate to EC2 services and click on the key pair left side menu.
Click on the create key pair button and fill in these values
- name = eksworkshop
- fileformat = pem
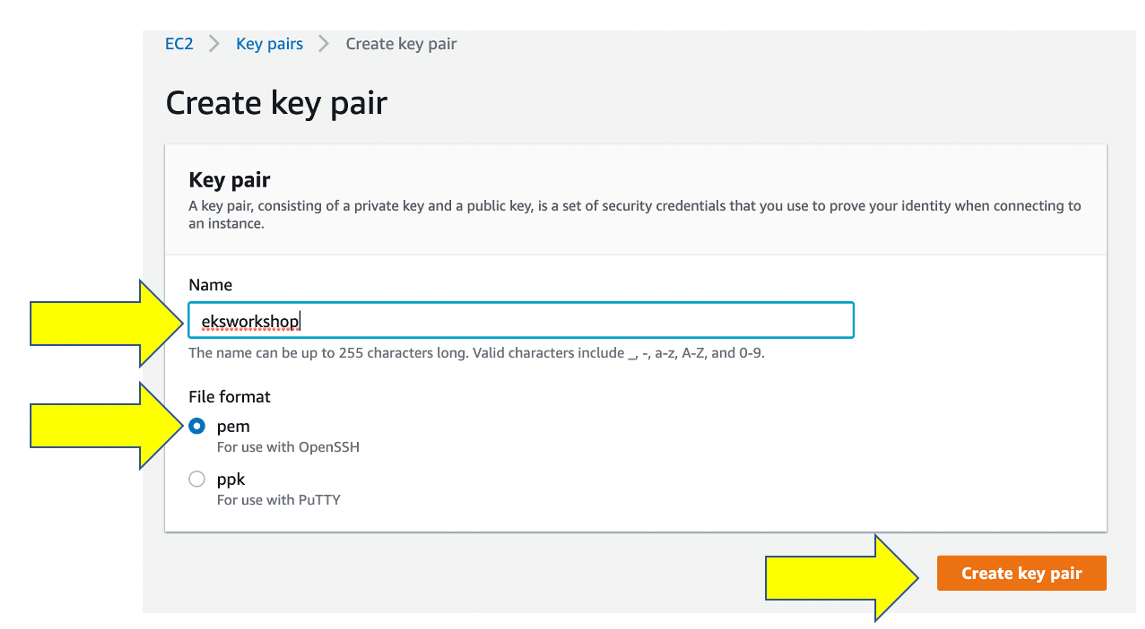
The name must be eksworkshop or the CloudFormation stack creation will fail.
Click on the create key pair, and a PEM file will be downloaded and you will return to the keypair page.
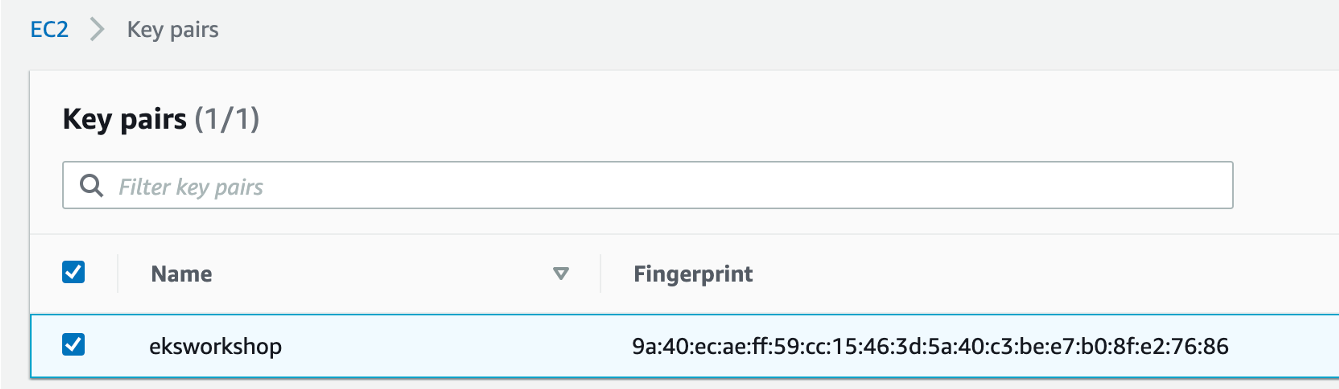
We will not need the PEM file for the workshop, but we recommend you save this file to a safe place especially if this is your AWS account.
Provision the workshop environment
This workshop creates an AWS account and a Cloud9 environment using a CloudFormation script.
- First need to add keypair named “eksworkshop” in us west-2 (Oregon).
The new web page should look like this:
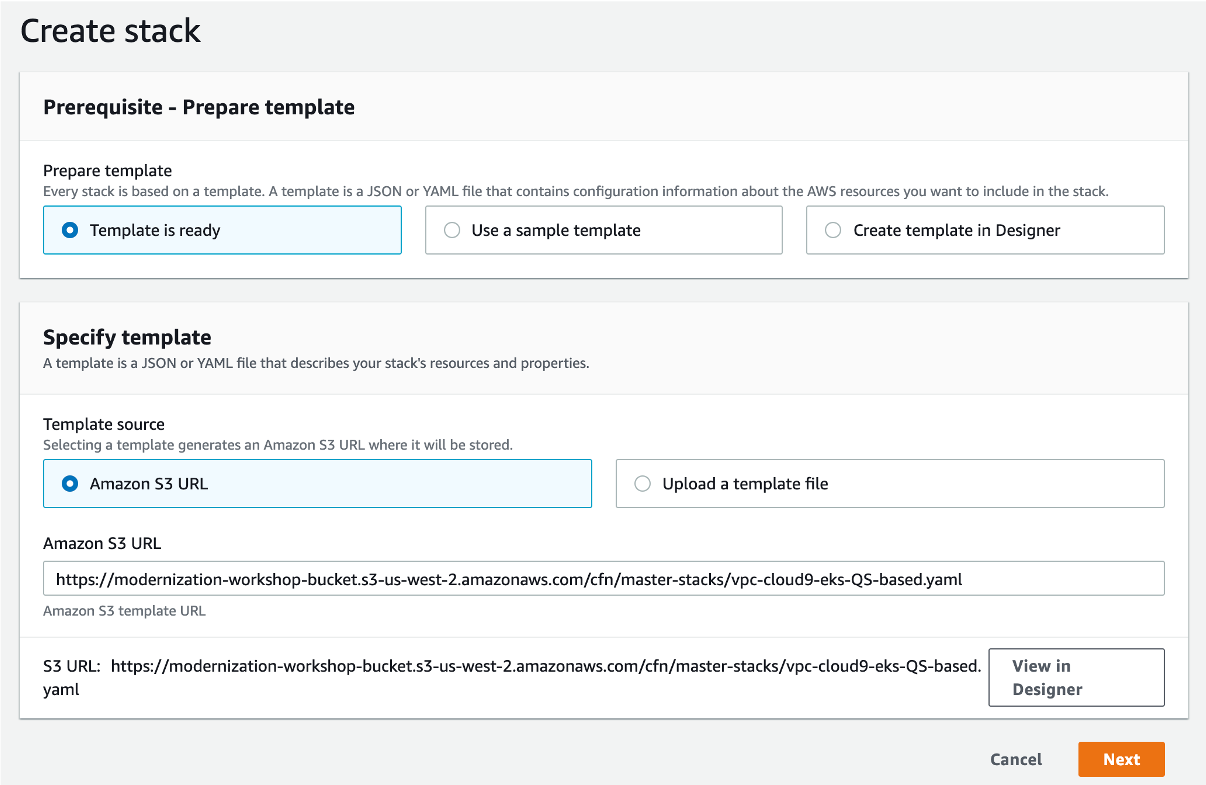
Choose all the defaults and click the Next button on each page. On the last page, accept all terms at the last page the CloudFormation flow and then click the Create Stack button as shown below.

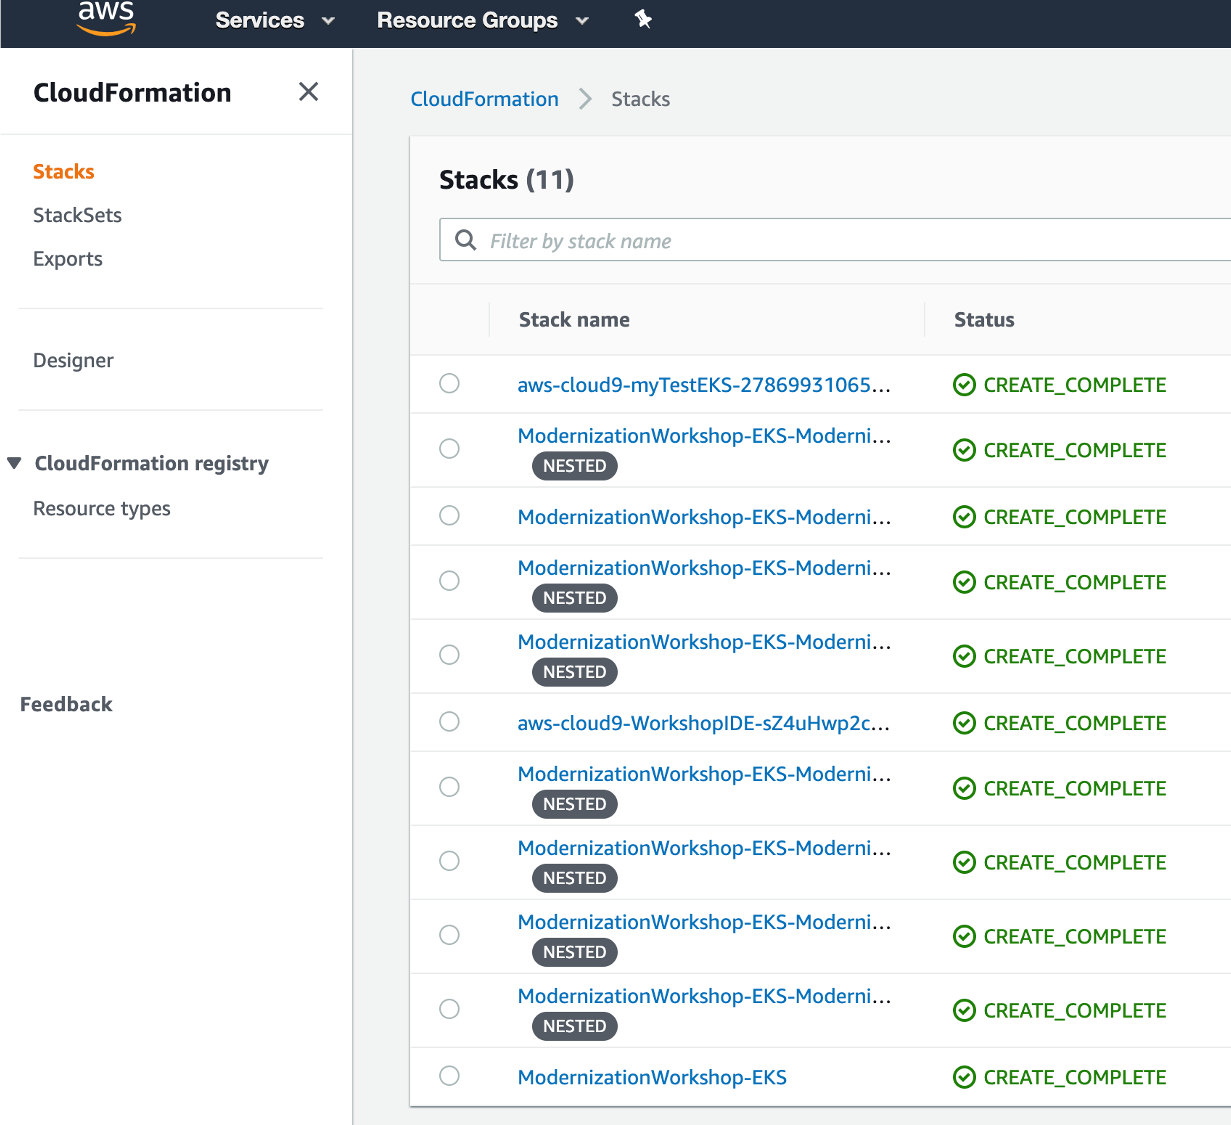
The deployment process takes approximately 20 minutes to complete. You can monitor in the AWS console CloudFormation service page. When it is done you should see CREATE_COMPLETE for all stack and nested stacks as shown below.
While you are waiting …
You will be asked to come back to the AWS console to review that CloudFormation status, but for now head to GitOps for EKS Prerequisites section.